

Golf Enclosures Guide: Expert Tips for 2026
|
|
Have you noticed how golf enclosures are popping up in homes and businesses everywhere as we head into 2026? It’s not just a passing trend—these setups are completely changing how golfers practise and play, right in their own space.
This guide is here to help you make the most of golf enclosures, no matter your skill level or budget. You’ll discover the different types available, what to look for before you buy, and how to set up your own space for a true pro experience.
Ready to transform your practice? Dive in for expert tips, the latest tech insights, and practical advice that will help you get the best out of your golf enclosures journey.
Curious about why golf enclosures are showing up in more homes and commercial venues? If you’ve ever wondered how to bring the driving range indoors, or want a safer, more immersive way to practice your swing, you’re in the right place. Let’s break down what these enclosures are, how they differ, and what sets the best ones apart for 2026.

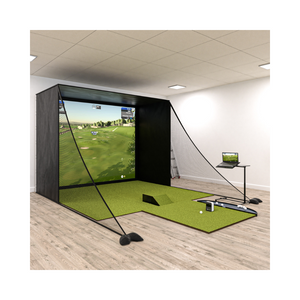
Golf enclosures are purpose-built structures, designed to create a safe, contained space for practising golf indoors or outdoors. Unlike basic golf nets or cages, golf enclosures typically feature a frame, high-quality impact netting, and an integrated screen for simulator use.
By enclosing your hitting area, you’re not just stopping stray balls, you’re also crafting an immersive environment. This is especially true when paired with a golf simulator, transforming any room or garage into a personal driving range or virtual course.
The popularity of golf enclosures is on the rise in both homes and commercial spaces, thanks to their ability to deliver a realistic, safe, and weatherproof golf experience.
There’s a range of golf enclosures to suit different needs. Permanent enclosures are ideal for dedicated golf rooms or commercial facilities, offering maximum durability and stability. Portable enclosures, on the other hand, are lightweight and easy to set up, making them perfect for temporary spaces or renters.
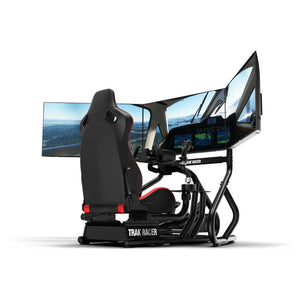
You’ll also find simulator enclosures, which are designed for full-screen projection and immersive play, versus simple practice cages that focus on ball containment. Commercial-grade models prioritise heavy-duty materials and professional aesthetics, while home-use options balance size and budget. DIY kits are popular for those who love a project, but pre-built packages save time and ensure compatibility.
Integrated packages, featuring mats, screens, and sometimes even projectors, are gaining traction for their all-in-one convenience. If you want to see how these systems work together, check out the Golf Simulators Collection for inspiration.
When comparing golf enclosures, durability is key. Look for frames made from steel or aluminium, and netting that can withstand repeated high-speed impacts. Impact resistance and reinforced baffle nets add another layer of safety, especially for indoor setups.
Size matters too. Standard dimensions like 3m x 3m x 3m, or 10’ and 12’ widths, are common, but always measure your space first. Compatibility with golf simulators and launch monitors is crucial for seamless integration, ensuring you get that full 100% image fill across your screen for a truly immersive session.
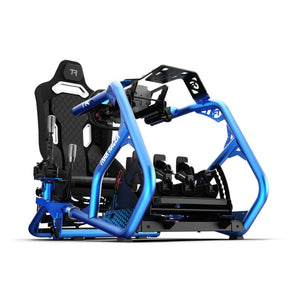
Other must-haves include secure anchoring, modular construction for future upgrades, and easy assembly. Leading examples like the Kaizen Masters Golf Simulator Enclosure and SIG series set the benchmark for 2026, offering robust safety enhancements and upgrade paths. With the right golf enclosures, you’re set for years of safe, realistic, and enjoyable practice.
Choosing the ideal golf enclosures setup can feel overwhelming with so many options on the market. Whether you're setting up at home or for a commercial space, knowing what to look for can help you get the best results and value for your investment. Let’s break down the essentials so you can make a choice that fits your space, goals, and budget.
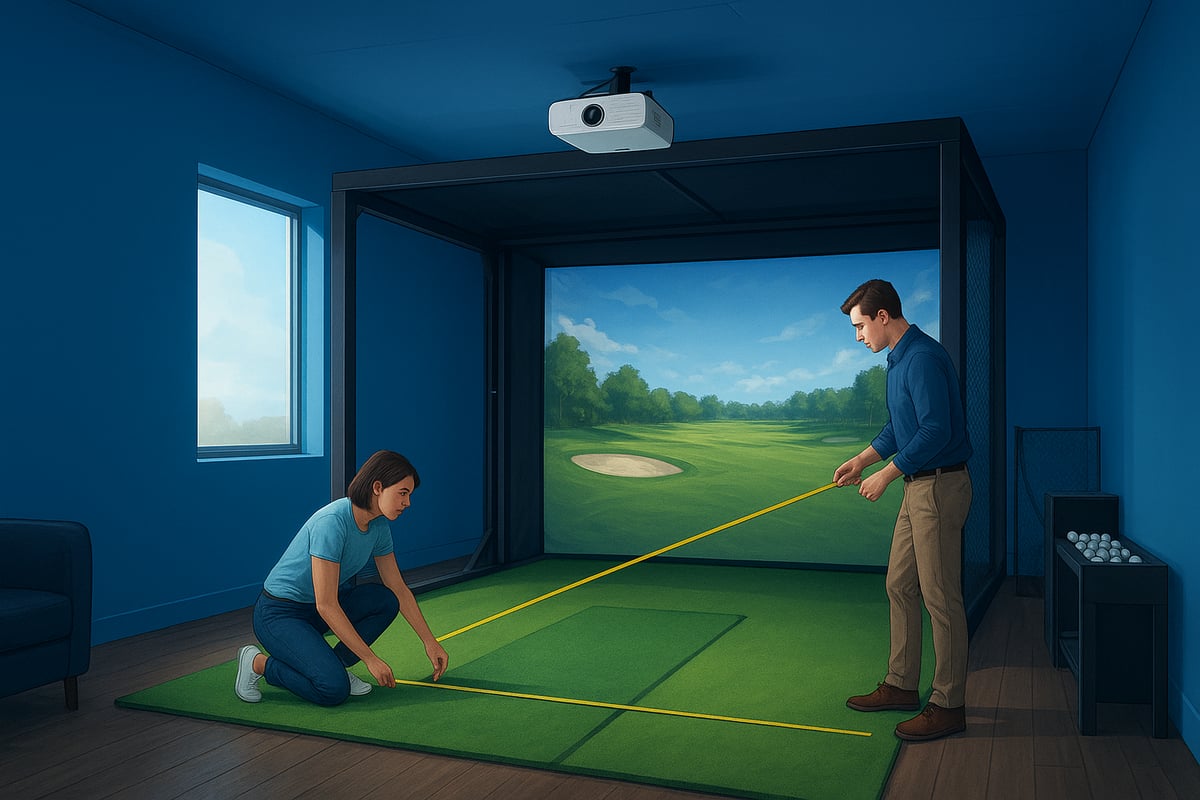
Before you get excited about the latest tech, start by measuring your available space. For most golf enclosures, ceiling height is crucial. Aim for at least 2.8 to 3 metres high and ensure there’s enough width and depth to swing comfortably.
Think about whether your setup will be indoors or outdoors. Indoor enclosures keep things simple, but outdoor options offer flexibility if you have the backyard space. Just remember, outdoor golf enclosures need to withstand weather, so durability is key.
Budget will play a big part in your decision. Here’s a handy breakdown:
| Enclosure Type | Typical Price Range | Extras Needed |
|---|---|---|
| Entry-level Cage | $390+ | Mat, net, basic screen |
| Mid-range Simulator | $1,800+ | Projector, launch monitor |
| Premium Package | $3,000+ | All-in-one accessories |
Don’t forget to factor in essential extras like mats, screens, and nets. For a closer look at must-have accessories that help maximise your golf enclosures setup, check out the Golf Simulator Accessories Guide.
Think about what you want from your golf enclosures. Is your main aim to improve your swing through practice, or do you want an immersive simulation experience with high-tech feedback? Practice-focused cages are simple and affordable, while simulation enclosures often include screens for projectors and are built for integrating launch monitors.
If you’re setting up in a commercial environment, durability and professional aesthetics matter more. For home users, a balance between portability and performance often wins out. Some people opt for portable golf enclosures that can be disassembled for storage, while others invest in custom or permanent builds for a dedicated golf room.
Real-world example: Many backyard golfers choose a 3m x 3m x 3m enclosure for a blend of space, safety, and versatility. If you’re after a bespoke solution, custom enclosures can be tailored to fit unique spaces or specific simulator requirements.
To make sure you pick the right golf enclosures, ask yourself a few key questions:
Listen to other users’ experiences. Customers in windy areas often report that strong, weather-resistant golf enclosures offer peace of mind and lasting performance. By answering these questions, you’ll avoid costly mistakes and enjoy your setup for years to come.
Ready to get hands-on with your new golf enclosures setup? Let’s break things down into simple steps, so you can create a safe, high-performing space for golf practice right at home or in your commercial venue. Whether you’re a DIY enthusiast or prefer to follow a checklist, this guide will help you avoid common headaches and set up your golf enclosures like a pro.
Before you build, take time to plan your golf enclosures setup. Measure your space—ceiling height, width, and depth are key. Clear the area of furniture and check for obstructions. List out your components: frame, netting, impact screen, fixings, and don’t forget essentials like power sources and ventilation if you’ll be using electronics.
Many golfers overlook the importance of quality mats at this stage. The right mat makes a world of difference in comfort and safety. For inspiration, browse these Golf Mats for Enclosures to find one that suits your needs.
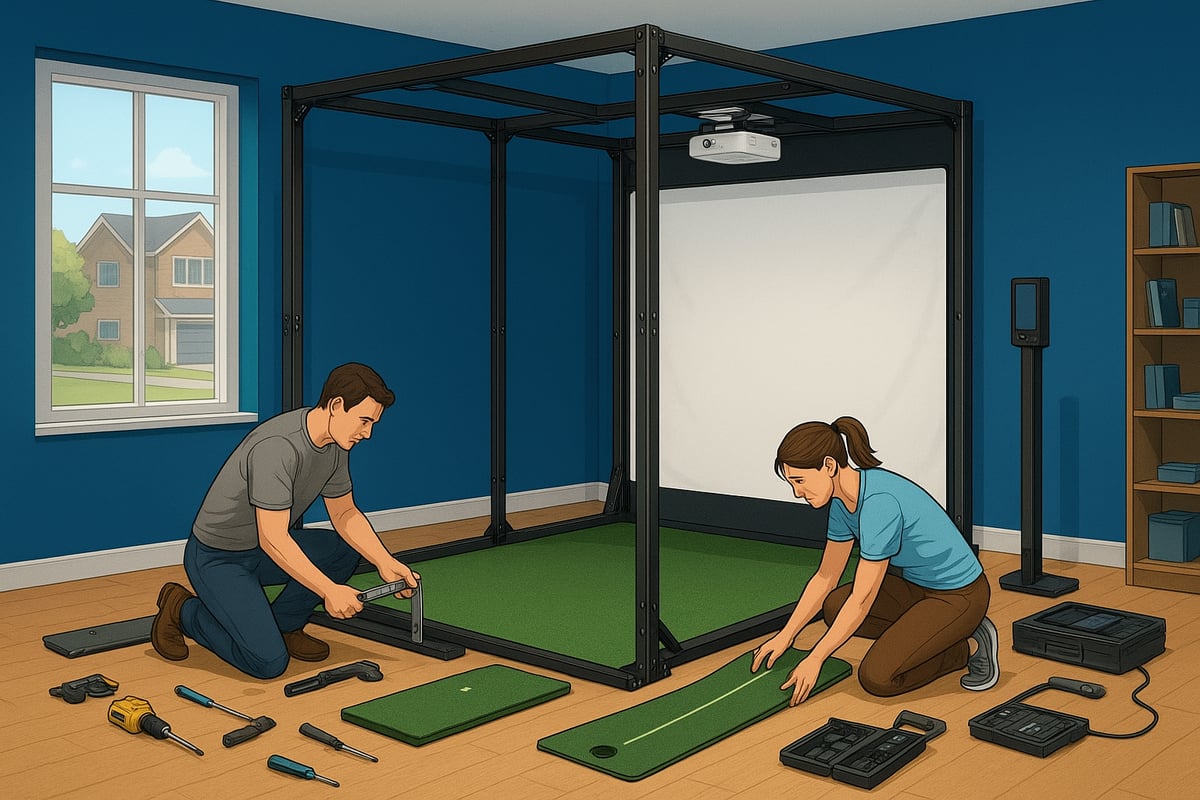
Check the manufacturer’s instructions and see if you need an extra set of hands—most large golf enclosures are much easier to assemble with two or more people.
Now, let’s get building. Lay out the frame parts and follow the instructions closely. Secure each joint and anchor point, making sure everything is stable. This is where patience pays off—rushing can mean loose connections.
Attach the netting and impact screens, pulling them tight so there are no wrinkles or slack spots. For larger golf enclosures, a four-person lift is recommended to avoid strain and keep things aligned. Reinforced baffle nets are a must for safety, especially if you’re planning high-intensity practice.
Testing stability as you go helps prevent surprises later. If you’re working outdoors, double-check all anchor points for wind resistance.
With the structure up, it’s time to add the brains to your golf enclosures. Install your launch monitor, projector, and gaming PC or console. Projector placement is crucial—aim for full image fill on your impact screen, as seen in the best SIG series setups.
Carefully calibrate your sensors and test the alignment. Tidy up cables to keep everything safe and out of the way. Many users find that tailored projector mounts improve visuals and make their golf enclosures feel truly immersive.
Test your simulator software and make sure it pairs smoothly with your tech. This step is where your space comes to life and starts to feel like a personal driving range.
Before you swing that first shot, walk through a safety check. Inspect every fastening on your golf enclosures and make sure netting is secure. Test how well balls are contained and how they bounce back—add extra padding or side netting if needed.
Set up ball trays, mats, and accessories for convenience. Angled baffle nets can significantly improve ball return, as many users have reported. Take a moment to tweak lighting and ensure everything feels comfortable.
By following these steps, you’ll maximise both the safety and enjoyment of your golf enclosures, setting the stage for countless hours of practice.
Setting up golf enclosures in 2026 is all about blending the right technology for an immersive, realistic experience. Whether you’re aiming for pro-level simulation or just want to practice your swing at home, integrating the best gear is what makes your setup shine. Let’s break down what you need to know to get the most out of your golf enclosures.

Choosing the right simulator system is the heart of any high-performing golf enclosures setup. You’ll find popular names like SkyTrak, Trackman, Uneekor, Garmin, and Rapsodo dominating the market, each with unique strengths. The key is to match your enclosure’s dimensions to the simulator’s tracking requirements, ensuring accurate ball flight and shot data.
Not sure which launch monitor will suit your needs? Check out this handy guide to Launch Monitors for Simulators for an up-to-date list of compatible units. Always double-check that your chosen software, such as TGC2019 or E6 Connect, pairs smoothly with your setup. As tech evolves, many golf enclosures are now designed to accommodate both photometric and Doppler-based systems, so you don’t have to compromise on performance.
Here’s a quick comparison:
| Simulator | Tracking Type | Best For | Space Needed |
|---|---|---|---|
| SkyTrak | Photometric | Home use | Moderate |
| Trackman | Doppler | Pro simulation | Large |
| Uneekor | Photometric | Versatile use | Moderate |
| Garmin/Rapsodo | Doppler | Portability | Compact |
Impact screens are a big deal in golf enclosures, and not all are created equal. You’ll spot options from standard to professional grade, each with different levels of noise absorption, ball speed tolerance, and wrinkle resistance. For home setups, customers tend to favour screens that are both quiet and durable, minimising distraction and wear over time.
Projector choice is just as important. You want 100% image fill on your screen for that truly immersive feel. Mounting options can make a world of difference, especially if your golf enclosures are in a tight space. Many users appreciate package deals that bundle premium screens and projectors, sometimes even with discounts thrown in.
Remember, a crisp, full-screen image can make your simulation practice feel like the real thing. Always factor in the projector’s throw distance and brightness to match your room size and lighting.
To get the most from your golf enclosures, pay attention to the accessories that elevate both safety and realism. High-quality golf mats with anti-slip backing and realistic turf are essential for comfortable practice. Ball trays, side netting, and upgraded lighting can take your setup from basic to pro-level in no time.
Wireless connectivity is another game-changer for 2026. Imagine tracking your data in real time without a tangle of cables. Noise dampening panels are also making waves, especially for indoor golf enclosures, cutting down on sound so you can practice any time. If you’re keen on staying ahead, check out the Top Trends in Golf Simulation & Sports Tech for 2026 to see what’s new in accessories and integration.
Reviews often highlight the impact of solid ball trays and stable mats for consistent practice. Investing in the right add-ons can dramatically boost the enjoyment and longevity of your golf enclosures.
When it comes to golf enclosures, safety and upkeep are front and centre. If you want your setup to last—and to keep everyone safe—there are a few key habits you’ll want to build into your routine. Let’s break down how to get the most from your golf enclosures with practical, expert-backed tips.
Safety is the foundation of any golf enclosures setup. Start by making sure your frame is anchored securely, especially if you’re setting up outdoors where wind can be a factor. Use baffle nets and reinforced corners to keep stray balls contained.
Regularly check all joints and netting for signs of wear. Safe cable management is a must if you’re running electronics, as loose cords can trip people or get damaged. For a detailed look at how proper sizing impacts safety, see How to Choose the Best Golf Simulator Enclosure Size. Many users have shared that sturdy golf enclosures can even withstand strong winds, giving peace of mind in unpredictable weather.
Keeping your golf enclosures clean and well-maintained is easier than you might think. Wipe down netting and screens regularly to prevent dirt buildup, which can affect both performance and longevity. If you notice wrinkles on your impact screen, address them early to avoid permanent creases.
Lubricate frame joints to keep everything moving smoothly and check for rust, especially on outdoor setups. Seasonal checks are a smart habit—just like you’d prep a garden for winter, give your enclosure a once-over before the weather shifts. Many users praise high-quality impact screens for staying quieter and more durable than cheaper alternatives.
Want your golf enclosures to go the distance? Rotate netting and screens occasionally so wear is spread out, not focused in one spot. Don’t be afraid to upgrade components like mats or screens as they age—think of it as giving your setup a fresh start.
Protect electronics from moisture and dust by using covers or cases when not in use. If something does break, reach out to the manufacturer for support or repair options. In fact, some golfers recommend buying the best impact screen first, then building the rest of the enclosure around it for easier upgrades down the track.