

How To Mount A Button Box?
|
|
If you’ve been scratching your head over how to mount a button box, you’re in the right place.
This guide clearly defines what “mounting a button box” means: fixing it securely to your rig or desk so it stays put while you use it and walks you through the entire process, step by step.
We start by defining the term: mounting a button box means getting it placed and secured so it feels solid, accessible, and built into whatever setup you're using.
Then we break down the how‑to: positioning, choosing hardware or clamps, drilling or using brackets, and locking everything in place. You’ll understand the “why” as much as the “what.”
Because knowing what mounting is helps you avoid loose boxes that shift mid‑game or shake when you press.
By the end, you’ll know exactly what we mean by mounting, why it matters, and what success looks like — a button box that feels permanent rather than temporary.
Stick around — it’s all here, and it’s built to get your setup working right.
Read on.
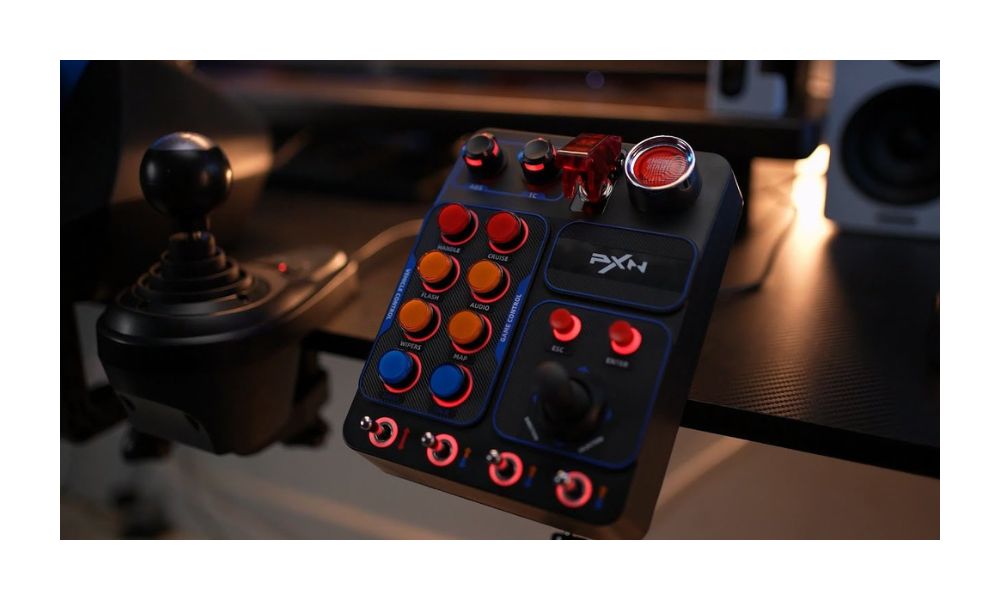
A button box is a USB‑connected panel loaded with switches, push‑buttons, knobs, and encoders that connects to your PC as its own game controller. Think of it as an auxiliary panel that gives you quick access to everything your wheel can’t handle.
Wheel rims have some buttons, sure, but most sims like iRacing or Assetto Corsa require far more inputs—brake bias tweaks, ignition, pit limiter, camera modes, even Discord mute or volume control.
With a button box, you keep your eyes on the track and fingers on familiar, physical controls. That means no switching to keyboard or fumbling through menus mid‑race.
A solid button box helps build muscle memory. You always reach to the same spot for gear maps, radio or bias adjustments. It works across different wheel setups so you don’t have to remap whenever you switch rigs. Some racers even use them to control companion apps like Simhub or Crew Chief, all without touching your keyboard.
In short: a button box is a practical, dependable way to expand control in sim racing, keeping your focus on racing.

A firmly mounted button box transforms your sim racing setup from shaky to reliable. When you learn how to mount a button box securely, you get consistent access to controls without worrying about movement during races. Loose mounting leads to shifting, flicked buttons, and frustration, something no racer wants in a clutch moment.
Using proper clamps, brackets, or aluminium‑profile mounts designed for sim rigs ensures your panel stays exactly where you need it. It lets you develop muscle memory so you don’t waste seconds hunting for pit‑limiter or brake bias toggles.
Risers or wobbly mounts can also cause fatigue over time. A solid mount guards against minor rig vibration and reduces finger strain from compensating for movement. That adds up session after session.
Stability also protects your hardware—USB connectors stay seated and wires don’t get yanked. A stable box improves input recognition and avoids disconnections mid‑race.
When we walk through how to mount a button box, you'll see how each mounting method, whether clamps, VESA‑style plates, rail kits, supports consistent positioning and long-term reliability.
That means fewer distractions, smooth control when it matters, and an all‑around more dependable setup that stays put when the race heats up.

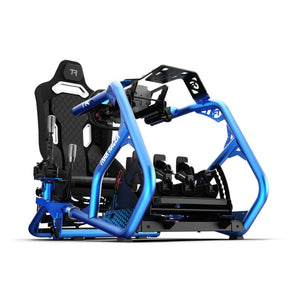
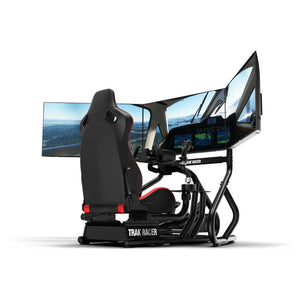
Understanding how to mount a button box starts with knowing when and where mounting matters most. In full sim‑rig setups built with aluminium‑profile frames like Trak Racer or Next Level rigs, precise mounting trims guesswork and places your controls exactly where your hands expect them.
Many rigs offer VESA‑pattern or profile‑compatible mounts to lock in a button box close to wheel height and angle. Users say standard VESA mounts work well when integrated into cockpit columns or centre consoles.
For desk‑based setups, a rigid desktop clamp or profile mount keeps the button box fixed in place even under wheel force feedback or button presses. A firm desk surface combined with a clamp prevents slipping—helping keep your hand positioning consistent race after race.
DIY panel builders often embed button boxes into custom control desks or panels. Mounting becomes essential for integrating your panel into furniture or consoles. Having a stable mount lets you switch between wheel, pedals, shifter, and box without spacing errors.
In short: whether you’re using a cockpit frame, desktop, or homemade panel, learning how to mount a button box lets you place it consistently, avoid shifts, and design around it.
You get faster access, less distraction, and a cleaner layout built around predictable controls.

You can’t nail how to mount a button box without the right mix of tools, materials, and hardware. Here’s what you’ll want ready before you drill or clamp:
Aluminium‑profile compatible mounts are a top choice. Products like Advanced SimRacing’s dual‑bracket universal mount let you swivel and tilt your box as needed.
Apex Sim Racing’s Mount V2, built from steel and aluminium, works with VESA patterns (50/75/100 mm) and delivers a rigid install unless you’re using Slim Racer or certain mini boxes.
VESA‑pattern plate brackets are another option. You’ll find mounts that support M3, M4, M5 and even M6 screws, attaching neatly to 8020 or 4040 profiles while allowing small positional tweaks after installation.
Clamps and desk mounts also serve well for desk‑based setups. Some clamp designs accommodate surface thicknesses up to 7 cm and can attach to monitor stands or desk struts for flexibility.
Your hardware checklist should include:
Arming yourself with these tools and materials is the first step in learning how to mount a button box confidently and reliably. You'll avoid shifting panels, misaligned holes, and weak holding points right from the start.

Follow these simple numbered steps to master how to mount a button box securely and confidently:
1. Positioning
Place your button box where it feels natural—near the wheel, within thumb reach, and at a height that won’t strain your arm. Use mock placements to test before fixing it in place.
2. Measuring and Marking
Measure carefully between mounting holes or edges. Mark pilot points on the mount or chassis using a pencil or tape. This helps avoid off‑center holes or misalignment.
3. Drill or Attach Hardware
If using a VESA‑pattern or profile mount, drill through marked points or set T‑nuts into aluminium rails. If using clamps, adjust clamp jaws and tighten according to mount instructions.
4. Secure the Box
Align the box with your marked points. Use the correct screws (M4, M5, M6 depending on mount) and hand‑tighten or use a wrench until snug. Avoid overtightening to prevent stripping threads.
5. Test Stability
Press buttons firmly and move the wheel to check for any wobble. If the box shifts or feels loose, tighten or reposition as needed.
6. Final Check
Recheck reach and angles. Confirm all screws are snug. Ensure cables aren’t pulled tight. A well‑mounted button box maintains consistent control and avoids mid‑race disruptions.
These steps cover how to mount a button box step by step, helping you achieve a stable, functional panel in your sim setup.

When you're tackling how to mount a button box, avoiding these common errors helps ensure your panel stays secure, precise, and frustration‑free.
1. Misplaced Mounting Holes
Drilling in the wrong spot distorts alignment or distresses the mount structure. Some Reddit users shared mounting to 80/20 profiles with misaligned VESA patterns. Always create a paper template or tape-down test to confirm exact hole spacing.
2. Using Incorrect Hardware
Screws that don't match thread size or depth can strip holes or loosen prematurely. Button boxes often use M4, M5, or M6 bolts—confirm size before you start.
3. Under-Tightened Clamps or Brackets
Some mounts like RAM or aluminium clamps offer flexibility but may flex or drift if not tightened properly.
4. Cable Stress on USB Connectors
If routing ignores strain relief, USB plugs can work loose mid-session. A stressed connector risks disconnecting your button box during racing.
5. Ignoring Vibration Over Time
Even tight mounts will loosen if vibration isn’t addressed. This tiny drift forces you to readjust grip or reach mid‑race. In motion setups this is especially problematic.
6. Mount‑Rig Compatibility Overlooked
Not all mounts fit every rig. Reddit posts warn that not every rig profile supports 75‑100 mm VESA mounts. One user noted needing a profile adapter or angle bracket when VESA plates wouldn’t fit their 80/20 setup.
By avoiding these mistakes, you’ll master how to mount a button box cleanly and accurately.
Expect panel alignment that doesn’t shift, stable control, and USB connections that stay secure race after race.

Trak Racer offers mounting solutions built for sim‑rigs using T‑slot aluminium profiles—ideal if you want a straightforward way to install and adjust a button box.
These mounts emphasise adjustability, compatibility across popular frames like TR8, TR8 Pro, TRX, RS6, and FS3, and ease of installation without modifying the rear of your button box.
Two standout options deliver predictable positioning, solid fixation, and easy installation:
1. Tablet and Button Box Upgrade Kit (V2/V3)
This universal kit fits rigs like TR8, TR8 Pro, TRX, RS6, and FS3. It clamps into 40 × 40 mm T‑slot rails with no need to drill into your button box. Included are two pivot points for angle and side position adjustments. It handles board heights from ~138 mm to 242 mm and tablets up to ~222 mm tall. That means ergonomic placement and a bracket that stays put while racing.
2. Button Box / Elgato Stream Deck Mount
Designed for compact panels or Stream Decks, this kit also works with T‑slot frames and provides full swivel range. Installation requires just clamp‑in assembly and hardware that comes with the kit. You lock your controls within easy reach without compromising stability or requiring panel modifications.
Both Trak Racer mounts include all necessary screws, elbows, clamps, and T‑nuts. That streamlines the setup process and removes guesswork around hardware compatibility. Once clamped and positioned, your button box remains steady under force feedback and during aggressive inputs.
Using these mounts transforms how to mount a button box from a technical struggle into a clean, repeatable and adjustable setup that stays reliable race after race.

You now know how to mount a button box in a way that really works and not just holds it in place but keeps it stable, accessible, and dependable.
Trak Racer’s mounting solutions make doing that simple: their kits clamp into T‑slot aluminium profiles, let you adjust tilt or side placement, and hold tight under wheel force feedback. That means no wobbles, no buttons shifting mid-session, just reliable control exactly where you need it.
If you’re ready to tighten up your rig and stop worrying about shifty controls, check out our Trak Racer button box mounts.
And hey—sign up to Gamer Gear Direct’s email list and get a mystery discount, plus special offers delivered straight to your inbox.
Sign up and start your next build with confidence.


